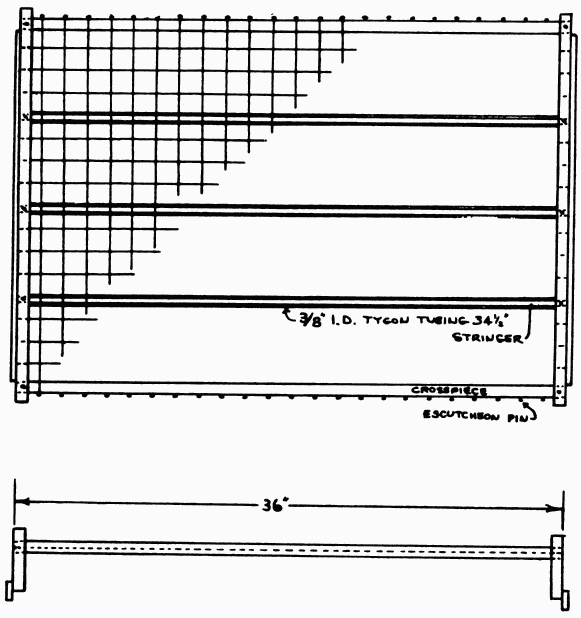

This drying rack is designed to make use of readily available materials and may be built using only hand tools, although an electric saw and drill will make the job much easier. The prototype units were 24" x 36", but I think the size could easily be increased up to 72" x 36" simply by lengthening the side rails. All fastenings are made with copper nails, and brass escutcheon pins are used as posts around which the monofilament line is strung. Tygon tubing, 3/8" inside diameter, is used to cover the stringer dowels (Figure 1).
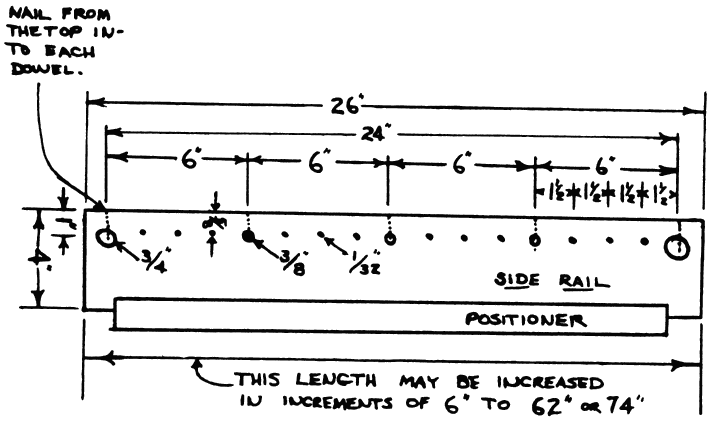
The mesh size can be adjusted by changing the number of holes in the side frames and the interval between the escutcheon pins in the cross pieces. 1-1/2" x 2" has worked well (Figure 2).
The holes for the escutcheon pins must be pre-drilled, the hole just slightly smaller than the pin itself.
Don't pull the line too tight or the rack will warp.
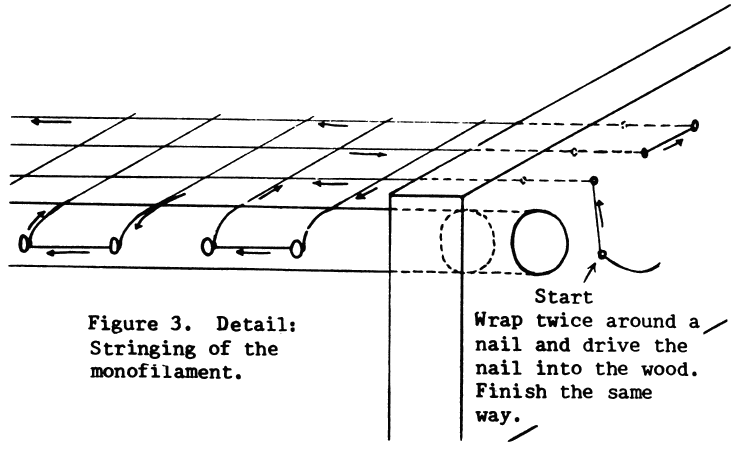
In the corner diagonally opposite the one shown in Figure 3 is an awkward spot where the line changes from going back and forth to up and down (or from east-west to north-south if you prefer). Any method that works is OK.
There seems to be no reason to try to "weave" the two layers together. One over the other has been satisfactory.

Figure 1. Paper drying rack: Plan and elevation.

Figure 2. Side view.

Figure 3. Detail: Stringing of the monofilament.