RESTORATION OF A LARGE CHINESE BRONZE URNAron A. Apisdorf
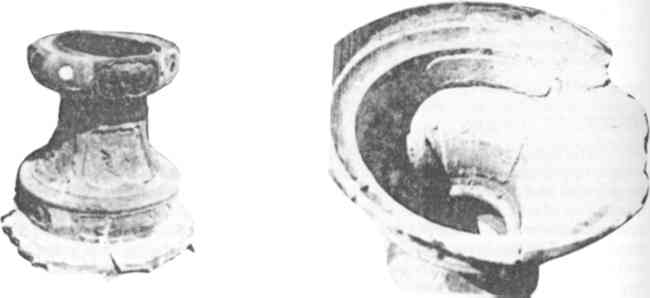
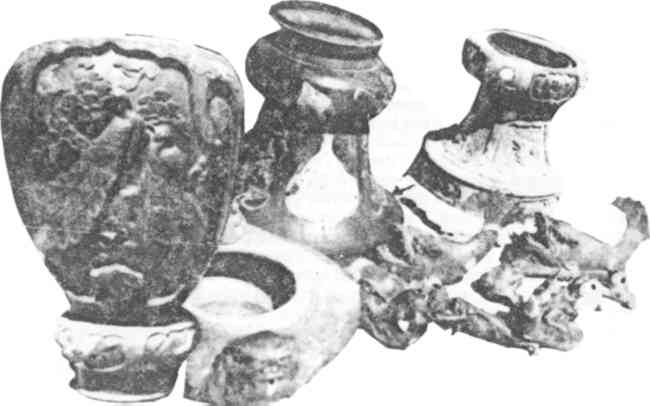
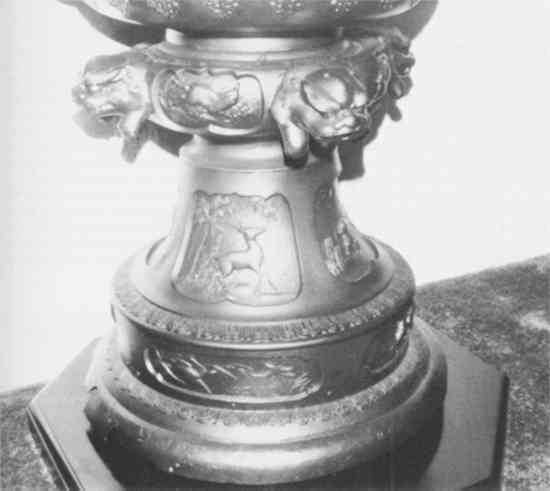
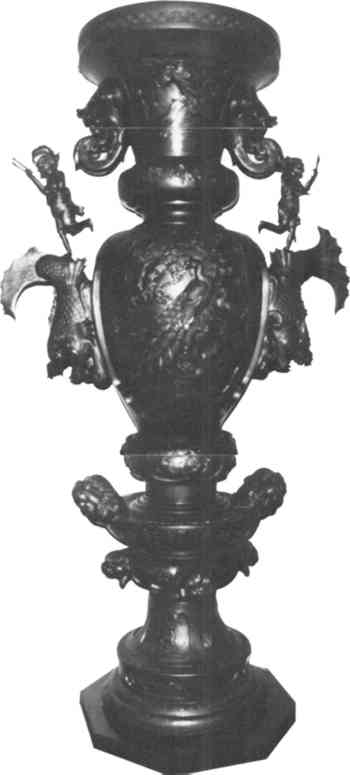
ABSTRACT—A six-foot bronze Chinese urn was received with extensive structural damage, mineral deposits and corrosion products on the surface and several parts torn off, some of them missing altogether. The surface was manually restored to bare metal, the weakened areas reinforced variously with fiberglass, acrylic resin and brass tubes, and the missing sections cast at four-fifths original size. Patina and acrylic protective coating were then applied to all parts and the urn reassembled and tested for weight bearing ability and stability. After several years, the urn was reinspected and shows no change in restored condition. 1 HISTORY OF THE URNThe urn is made of bronze. It stands approximately six feet, two inches tall and weighs approximately three hundred fifty pounds. The top and bottom diameters are twenty-one and one-half inches, the circumference sixty-seven and one-half inches. It is made up of four main sections, or levels, and was designed so that it might be taken apart and reassembled. There are several small decorative sections also designed to be removable. The urn is probably of Chinese or Japanese origin dating back to the latter half of the nineteenth century. Various sources (see Acknowledgements) indicate that large bronzes such as this were traditionally used in China as gift objects which one company might present to another company or one rich person to another. It would have been used as ritual furniture/statuary, rather than being a functional piece. The urn was acquired by the present owner's family about thirty years ago in New York City, and was taken to Venezuela, where it was displayed outdoors as a water fountain. For this use, it was reinforced inside and at the base by iron bars, and set into concrete. In 1979, the urn was removed from the concrete base for shipping to Miami, Florida. 2 CONDITION OF URN AS RECEIVED BY RESTORERThe high humidity of the Venezuelan climate and the water pouring over the urn from the fountain had caused heavy deposits of calcium to be left on the lower part of the base, and the whole urn had suffered loss of patina. Also due to the humidity, the water, the presence of the iron reinforcing bars, and the lime in the concrete base, a reaction had taken place over the years which had caused the bronze to deteriorate. The surface and some whole sections of the metal had become a greenish-white granular substance, which looked like hair growing on the bronze and which crumbled upon being touched. The deterioration of the bronze in the areas touching the iron bars was so extensive that the bronze in these areas was completely eroded away. In addition, there were four large vertical fissures and several small fissures in the areas above and adjacent to the eroded areas (Fig. 1). The separations at the bottom of the largest fissures were approximately one inch wide. The upper part of Level I had a crack twelve inches long in its upper surface, and that upper surface was severely depressed because of structural weakness caused by the deterioration of the bronze. Level I could not support the heavy upper levels.
In addition to the damage sustained over the years, the urn was subjected to grievous damage by the shipper. In the process of removing the base of the urn from the concrete, whole sections were completely torn off the bottom rim of the base
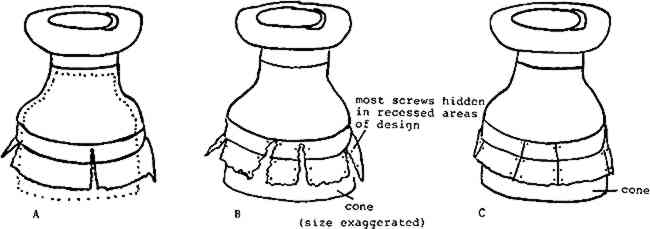
3 PRELIMINARY TREATMENT OF THE URNTreatment of the urn began with tedious hours of manually chipping and scraping with non-metal tools the greenish-white granular deposits (probably copper sulphate) off down to bare metal. In many areas the metal had deteriorated to a very thin caliber and was quite brittle at the edges so that extreme care had to be exercised. Next began restoration of each level with its individual problems. 4 TREATMENT OF LEVEL I (THE LOWEST PART OF THE URN)The first problem tackled was that of improving the ability of Level I to bear the weight of the upper levels. I considered using a brass strip welded into a ring and inserted into the base to take over weight-bearing from the damaged bronze base. I feared, however, that the weld might eventually succumb to the pressures on it and open and press outward on the base. I decided instead to use a cone-shaped fiberglass ring eighteen inches tall and nearly the same diameter and shape as the urn (wide at the bottom, narrower at the top). The fiberglass ring was from a commercially made object (a flower pot), which I cut to a ring three-quarters of an inch thick at its base and two-thirds inch thick at the top. This reinforcing ring was fitted into the urn so that it extended one inch below the original bronze base in order to have the fiberglass function as the actual weight-bearing support (Fig. 3A). (This was aesthetically acceptable to the owner as he planned to stand the urn on a carpeted area and expected that the pile of the carpet would for the most part conceal the fiberglass at the base.)
Round-headed brass screws (4–32) three and one-half inches long and brass nuts were used to attach the fiberglass to the bronze. Brass was used because it is compatible with bronze and would not cause an electrolytic reaction. Four screws were attached with the head on the outside of the urn, about four and one-half inches from the floor in the strongest parts of the base. Then screws were attached in pairs three-quarters of an inch from each side of the fissures, two to three pairs per fissure (Fig. 3B). These pairs of screws were tightened to the fiberglass slowly, using equal pressure, beginning at the narrowest point of the fissure and progressing toward the widest part of the opening. Because the circumference of the fiberglass was just slightly less than the original circumference of the base, screwing the bronze to the fiberglass in this way resulted in the closing of the fissures completely without additional metal fatigue (Fig. 3C). Next, the depressed area on the uppermost part of Level I was forced back into position to match the other side, by applying pressure from inside the urn. In order to hold together the two sides of the twelve-inch crack, I considered brazing, soldering with 50/50 solder or soldering with 60/40 solder. I rejected brazing because it is a method that requires heat so high that I feared it would fatigue the metal, since the surrounding area was still porous. I chose to use 60/40 solder (and Burnley soldering paste as flux) because it flows more easily than 50/50 and as a result it flowed into the adjoining porous area and reinforced it. Before soldering on the urn itself, I tested the process on some small sections that had broken off the urn at the lowest level. Since numerous other sections of the urn showed signs of having been soldered with lead solder, I had good reason to believe that the urn could accept the lead solder, which it did. After soldering, Levels II and III were placed into position to test the stability of the work done so far, but they did not rest properly on this mended area, and they wobbled. They were removed, the crack resoldered, and the area supported from
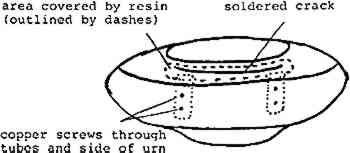
At this point Level I was ready to support Levels II–IV. The bottommost rim of Level I, however, had lost thirty to thirty-five percent of its area to corrosion and the shipper. In discussion with the owner, it was decided not to attempt to replace these missing areas as if the damage had not taken place, but rather to reinforce the rim to prevent further damage. Some pieces of metal which had broken off this area were kept for testing soldering and patination techniques. Again a circle of fiberglass was used to fit inside this rim, and outside the fiberglass cone installed earlier; it was attached with brass screws (Fig. 5). I was able to assemble the urn so that the area where the fiberglass was most visible was turned to the wall when placed in the owner's home.
The details on the bas-reliefs on Level I had also deteriorated and were quite faint. I used metal hand tools to enhance the visibility of these details. Three bullfrogs 5 TREATMENT OF LEVELS II–IVLevels II–IV were in much better condition structurally than Level I and did not need to be strengthened. On Level II, the bullfrogs were loose and were resoldered. On Level III, the supports for two decorative sections had been torn off before shipment to the United States and had to be soldered back on. Since the removable decorations they supported weighed thirty-five to thirty-eight pounds, special care was used in soldering and reinforcing the supports. On these removable decorations three small missing sections were carved in wax at four-fifths original size (to demonstrate that they were part of the restoration and not original) and cast in an alloy of copper, silver and a minute amount of gold, and soldered into place. This alloy was selected because I believed that it would accept patination most successfully. 6 FINAL STEPSPatina was applied to the surface of every bronze piece inside and out, using dilute hydrochloric acid and low heat. After the desired patina was achieved, the acid on the surface was neutralized with household detergent and a baking soda solution. The urn was then thoroughly rinsed. At the owner's request, surfaces of the fiberglass and acrylic resin were painted to match the color of the patina. Several layers of Incralac protective coating were applied to seal the urn from pollutants in the air and also to prevent oxygen in the air from combining with any residue of the patination process which might have been left in the porous areas of the metal. Due to the extensive damage which had been sustained by Level I, it received an extra layer of Incralac to guard against further oxidation from within. In addition, a five-foot electrical heating rod was suspended inside the urn. This was to be used to protect against Miami's humid climate during intervals when the home is not air-conditioned. The urn was assembled and kept in my studio for several weeks to make sure that the lower levels could now withstand the stress of supporting the upper levels. When I was satisfied that they were able to do so, the urn was disassembled, taken to the owner's home and reassembled. It was positioned next to a wall and attached to the wall in back of Level IV to prevent leaning, since it stands on soft carpeting. 7 NEARLY THREE YEARS LATERAt this time, the urn was inspected. Under very close observation, no deterioration is in evidence and the urn's condition has not altered in any way (Fig. 6).
8 ETHICSThe question has been raised as to the ethics of this restoration of a large, weight-bearing, relatively modern object. First of all, I see a difference between museum pieces, that is, pieces of high aesthetic quality and cultural importance, and objects which have sentimental value to a private owner, and, perhaps, also some Thirdly, restoration of this urn provided me with an opportunity to devise and learn new techniques. Meeting the challenge of this piece was a source of great satisfaction to me. Needless to say, my choice of techniques is open to discussion, and this report itself is evidence of my understanding that on other pieces of comparable materials but in different condition and situation, other procedures would be more appropriate. Fourthly, and I realize that this is a very sensitive subject, a conservator working in the general community is dependent upon the restoration work available to him to make his living. While I certainly agree that he should never engage in unethical practices such as restoring an item in such a way that an unscrupulous individual could sell it as being in original, perfect condition, I submit that he cannot always engage in the luxury of refusing a commission simply because the piece is too large or too new. I took pains to restore this urn in such a way as to make it evident that restoration had been done; to me this was the most important ethical consideration. ACKNOWLEDGEMENTSI wish to thank F.L. Hollendonner of the Cleveland Museum of Art and Eleanor McMillan, Supervisor Conservator of the Conservation Analytical Laboratory, Smithsonian Institution for their encouragement to me when I embarked on a conservation career. Thanks are due also to Mr. Emilio Cianfoni, Chief Conservator of Vizcaya Dade County Art Museum, Miami, Florida for bringing this interesting project to my attention, and to Mr. Richard Perry of the Fine Arts Department of York University, Toronto, Canada, to the Chinese Curator of the Royal Ontario Museum, and to Mr. Brian Dursum, Curator of Oriental Art and Assistant to the Director, Lowe Art Museum, University of Miami, Miami, Florida for their assistance in identifying the urn and supplying background information. I also thank the owner for allowing me to publish the treatment of the urn. Finally, great thanks go to my wife, Judith C. Apisdorf, for her invaluable help in the preparation of this article.
 Section Index Section Index |
